YouTube is an undeniable force in education. It has become among the top search engines! When people need information, they often turn to YouTube. Teachers also LOVE YouTube! There tens of thousands of videos of instructional content, songs, and fun. Whether it’s a song about short vowels or a lesson in fact and opinion, YouTube has resources to teach and reinforce many educational topics for all grade levels and subject areas.
As with many internet resources, YouTube has a dark side of potentially inappropriate content. This sometimes prevents our primary teachers, the teachers of our littlest learners, from using YouTube in order to protect their students from the questionable content and advertising. And while internet filters have a place in school, they aren’t the only answer. We have to teach even our littlest learners how to safely navigate through any danger they might encounter.
Below I have collected ten safe and smart practices for using YouTube in the primary classroom. Please enjoy these tips and tricks to help make YouTube safer, more accessible, and appropriate for our littlest learners.
1. Make sure your kiddos are connected/signed in through their Google accounts.
Youtube and the Google Suite work together to help make sure that the content available to students is appropriate and educational. Your Google Suite administrator can use the managed YouTube features to limit and customize access to non-educational or inappropriate content.
 |
| Video has been approved in the domain. |
2. Have a system/procedure for distributing video links!
Use Google Classroom, QR codes, or your Learning Management System to distribute video links. This will get young students directly to the content you want them to see. Provide a clear path, and your little learners won’t get lost along the way!
3. Keep it short!
Primary students have tiny attention spans. Use the YouTube search filters to identify videos that are under 4 minutes. Skip past extra content by sharing a link to a specific starting time in the video. Tools such as Tubechop will also allow you to create links that play only certain parts of your YouTube video.
4. A Clear View.
Add an additional layer of focus and protection by using tools such as viewpure.com or safeshare.TV. These resources embed the YouTube content into a cleaner screen, without the Up Next, Suggested, and video comments. These resources also allow you to create links to custom starting and ending times.
| Before ViewPure, video screen shows comments and suggested videos. |
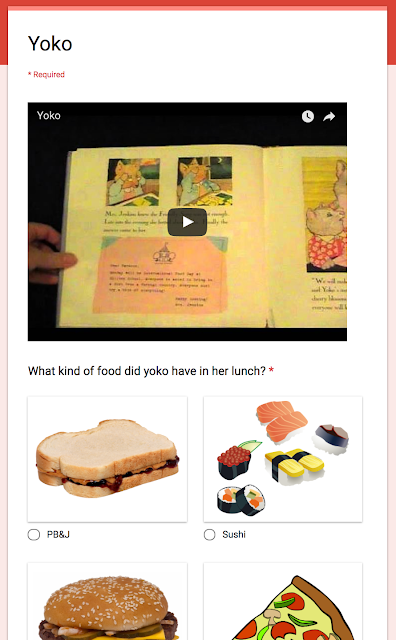
Embedding videos into Slides, Forms, and Sites is another way to hide some of the YouTube distractions. This allows students to view the content directly in the Google application instead of a new tab.

6. AdBlock for YouTube
Use the free extension AdBlock for YouTube to help minimize YouTube ads! This tool gets rid of all pre-roll advertisements on YouTube videos.
7. Preview EVERYTHING.
It’s important that you watch every video from start to finish BEFORE sharing it with students. Use the play speed controls in YouTube to save time during preview. Playing videos at 1.5 or 2X speed lets you check the videos quickly!
Check out this YouTube tutorial by Josh Harris @ EdTechSpec about previewing videos quickly.
8. Create playlists!
One way to organize your YouTube experience is to create Playlists of your favorite content. Playlists allow viewers to program what they watch next on the channel. Playlists will allow you to play a continuous set of videos in your chosen order. For example, you can make a playlist of related content such as short vowel videos or videos about the letter B. Create a 15-minute rainy-day playlist of your students’ favorite Just Dance videos for those days you have indoor recess and want to give your kiddos a chance to get their wiggles out!
9. Subscribe to your favorite educational channels!
There are educators from around the world creating powerful content. Subscribe to your favorite creators and channels to receive notifications when they add new content!
10. YOU be the YouTube star!
If you can't find just the right video to meet your young scholars’ needs, create it yourself! You can record videos using basic tools such as your device’s native camera or Screencastify in the Chrome browser. Video editing tools such as iMovie, Camtasia, or WeVideo let you add functional and creative finishing touches to your videos. Upload them to YouTube or Google Drive for sharing!
For more information, visit Youtube.com/teachers. This website offers tips and tricks for leveraging video in the classroom.
Find a full presentation of resources here: Bit.ly/K2YouTube
Find a full presentation of resources here: Bit.ly/K2YouTube


